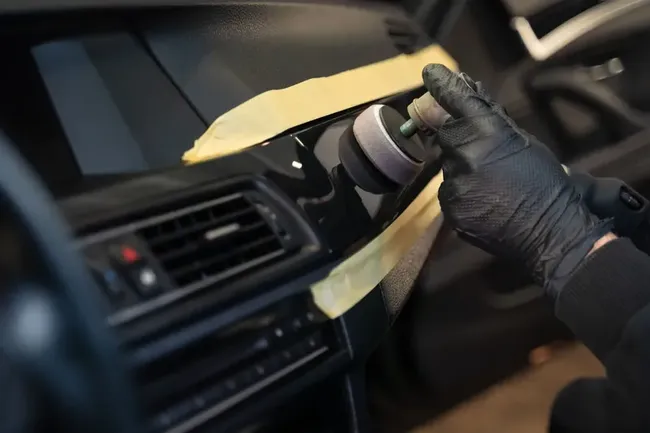
Restoring interior plastic starts with assessing the surface. Similar marks on a door panel, console or decorative trim can be dirt, damage to a finish or a scratch in the material itself. This determines whether cleaning is enough, local work is possible or a replacement part should be considered.
BESTAUTO lists plastic element repairs from 200 ₾. Interior trim polishing is a separate line from 200 ₾; it does not mean every plastic surface is suitable for polishing. This guide covers damage, inspection, methods and care. For the actual offer and studio choice, see interior restoration in Tbilisi.
What interior plastic does and why its finish matters
Plastic is used in door panels, consoles, trim and other interior parts, allowing different shapes and finishes. Appearance, everyday use, fit and the condition of mountings matter to the owner. Colour alone is not enough to choose a repair.
A smooth glossy insert, a matt textured surface and a part with painted or soft coating require different assessment. Inspection considers the material, any surface layer, texture and the sheen of surrounding areas. The agreed aim is a suitable appearance and the required function, without promising to turn every worn part into a new one.
Scratches, cracks and colour changes: different kinds of damage
- Dirt and contact marks. Sometimes another material has left a mark or dirt has accumulated. Start by checking what suitable cleaning can remove. Stains and dirt throughout the cabin are covered by interior cleaning.
- Scuffs and scratches. Everyday contact, objects and unsuitable cleaning can leave marks. Check whether only the finish is affected or the texture and base material are also damaged.
- Worn finish or changed colour. Assess a painted layer, stickiness, peeling and neighbouring areas separately. Adding shine does not necessarily resolve the cause.
- Cracks, chips and broken mountings. Assess depth, edges, fit and whether the part can be worked on. Improving its appearance does not automatically fix a mounting problem.
Causes can include contact, impact, ageing finishes, sunlight or unsuitable products. A damage label alone does not establish the cause or an appropriate repair. For some parts, replacing the damaged element is the more reasonable option; discuss that before work begins.
What is checked during inspection
- Material and finish. Identify the part, coating, texture, colour and sheen. Tell the specialist about previous painting, repair and products applied.
- Depth and area. Examine scratch edges, surrounding condition, cracks, chips and signs that the material is deteriorating.
- Access and mountings. Assess fit, possible removal and access to the damaged area. Any additional disassembly is agreed in advance.
- Expected result. Discuss which area to restore and how closely it can match the remaining surface. Clarify possible traces, limitations, scope and price before repair.
An overall photo and a close-up in good light help start a preliminary discussion. A photo may not show texture, the base material or mountings. The final method, price and timing are agreed after inspecting the vehicle.
Which restoration approaches may be considered
| Part condition | What to discuss |
|---|
| Dirt or contact marks on an undamaged surface | Suitable cleaning and reassessment afterwards; restoration may not be needed. |
| Surface marks on a smooth glossy finish | Whether that finish is suitable for correction or polishing; depth and remaining coating limit the result. |
| A scuff on a matt or textured surface | Possible local finish restoration, considering colour, sheen and the surface pattern. |
| A worn painted layer | Preparation and finish restoration; the area to work on and matching adjacent trim. |
| A crack, chip or damaged mounting | Whether repair is appropriate for that part or replacement is needed; material condition and fit. |
Where suitable, options may include cleaning and preparation, local correction, filling damage or restoring a finish. Sanding, polishing and colouring serve different purposes. They are not prescribed in the same way for every plastic; pattern, colour and sheen are assessed together. The actual work offered by BESTAUTO is confirmed through inspection and an agreed proposal.
Materials and technology: useful questions to ask
Ask whether the repair material suits the surface, how the area will be prepared and what appearance to expect. A modern material alone does not promise an invisible repair, greater strength or restoration of every complex shape.
3M's plastic repair resources require evaluation of the specific part and its manufacturer's guidance. A bumper procedure cannot automatically be applied to cabin trim; its material and purpose need separate assessment.
Texture and sheen both matter to a finish. Colourlock's plastic and artificial leather guidance notes that a repair may leave a trace and severely worn material may need another solution. Discuss the expected finish and scope before work.
Why seek an assessment and how to compare options
A professional assessment helps choose the scope: cleaning, a local area, a larger zone or replacement. Compare cost, an acceptable result, timing and any disassembly needed. Keeping the existing part can be useful, but repair is not always quicker or better value than replacement.
A cared-for interior is more pleasant to use and may matter when selling a vehicle. Local repair does not guarantee a higher resale price, factory condition or complete invisibility of every defect. Discuss the result for your part as well as the name of the technique.
Caring for restored plastic
- Ask when the repaired area may first be cleaned and used normally; guidance depends on the work and materials.
- For routine care, use products suitable for the surface and a soft clean cloth. Check compatibility in an inconspicuous area, following the product instructions.
- Do not treat strong solvents, abrasives or vigorous rubbing as a universal way to remove a mark. They can change a coating or finish.
- Ask whether protective care is useful and how often to renew it. One product does not promise permanent protection from sunlight or every type of wear.
- Watch for fresh contact damage and changes to mountings. Show a changed surface or crack to a specialist before treating it again.
Plastic restoration price and the next step
The current BESTAUTO price list shows plastic element repairs from 200 ₾ and interior trim polishing from 200 ₾. These are different operations; the starting amount is not a price for restoring the whole cabin. Damage, area, finish condition and agreed scope affect the quote.
All services are available at both studios: Saburtalo and Guramishvili. Choose a studio on the interior restoration page and discuss an inspection. Polishing, colouring and reupholstery address different tasks; plastic first needs a suitable approach. Seat leather repair is covered in the leather seat restoration guide.
Can polishing remove every scratch?
The answer depends on the surface and damage depth. Textured, matt and painted parts need separate assessment; a universal polishing promise does not describe their condition.
Will the repair be completely invisible?
How closely colour, sheen and texture can be matched depends on the material and damage. Discuss the achievable result and any possible trace before work.
Is a photo enough for a final price?
Photos help start the discussion. The finish, base material and access are checked on the vehicle; the final quote and timing are agreed after inspection.