Preparing paint for ceramic coating starts with its condition, rather than a package chosen by the car's age. A new vehicle may have transport or wash marks, while a well-maintained used car may need cleaning and only limited correction. The surface must be assessed without road film, wax or other residues that obscure its actual condition.
Ceramic coating helps simplify maintenance and preserve gloss, but it does not repair clear coat, remove chips or replace polishing. Before application, agree which contamination will be removed, which defects can reasonably be reduced and which will remain. This guide explains the preparation sequence, the limits of correction and the questions to ask before booking.
Contents:
What Paint Correction Means and How Preparation Is Chosen
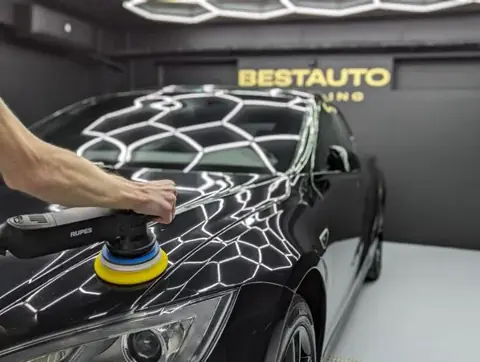
Paint correction means reducing visible defects in a painted finish. On a conventional clear-coated car, abrasive polishing may reduce wash marks, holograms and haze. This differs from applying a wax or dressing that temporarily improves appearance. Polishing changes the surface; ceramic is applied to the prepared result.
There is no universal scale that assigns “level 2” to a two-year-old vehicle and “level 3” to a five-year-old one. Studios may use different package names. Discuss the actual defects, repainting history and the finish you want: a tidy daily-driver appearance, clearer reflections, or attention to particular areas. The number of passes and materials should follow the condition rather than become the goal of the booking.
Before inspection, mention repainting, previous polishing, chips, peeling and recent repairs. Photos can start the discussion but cannot reveal every defect or establish the remaining clear-coat reserve. Edges, complex shapes and areas with a different repair history may need a more limited approach than the rest of the body.
Surface Cleaning and Polishing Solve Different Problems
First, remove contamination that interferes with assessment and preparation: road film, tar, metallic fallout and old protective products. Cleaning methods should follow the contamination and paint condition. Mechanical treatment should not be added automatically just because it appears in a standard list of stages; unnecessary treatment does not improve preparation.
Once the finish is clean, it is easier to distinguish contamination from damage. A stain, bird-dropping mark or hazy patch may need different approaches. If the problem extends below the surface or the finish is failing, trying to polish it away at any cost can worsen its condition. An agreed result may include defects deliberately left in place.
The surface must also be free of oils and residues incompatible with the selected coating. The precise sequence depends on the material. For example, the GYEON Q² Mohs EVO instructions require a clean, oil-free and dry surface. This illustrates product requirements; it does not mean that this specific coating is included in every BESTAUTO package.
Light Wash Marks, Holograms and Reduced Gloss
If the finish is suitable and the main concern is washing marks or uneven gloss, moderate correction may be enough. These marks are particularly visible on dark paint under directional light. Define the expectation clearly: reduce visible marks, improve reflections and prepare for coating, without promising the removal of every scratch.
The work is chosen after assessment. One area may suit a single pass while another requires a different sequence. Age, body size and a package label do not establish the need for two or three stages. Timing also depends on the agreed work; the same fixed turnaround cannot be guaranteed for every sedan.
The body polishing page explains the service and current offers. When preparing for ceramic, agree the work for your own vehicle rather than assuming that any polishing at the starting price includes removal of every defect.
Deeper Defects: Agree the Limits of Correction
A visible scratch, pronounced haze or marks from earlier polishing do not automatically justify the most aggressive treatment. It can be better to reduce a defect's contrast and leave part of it. The aim is improvement within the finish's limits while preserving usable paint, rather than a perfect photograph at any cost.
A thickness gauge can inform assessment, but its readings need careful interpretation. Common magnetic or eddy-current gauges on metal measure the total coating system, not the remaining clear coat alone. Manufacturer DeFelsko explains these limits; there is no universal correct thickness for every car.
A single figure such as “this many microns can safely be removed” cannot be treated as permission for deep polishing on every vehicle. Condition, repair history, panel material, measurement method and the defect must be considered together. A thick overall reading does not prove a large clear-coat reserve, and a repainted panel cannot automatically be classified as safer or thinner than factory paint.
Before work, ask which defects can be reduced, what will remain and where correction will be limited. If your expected result would risk the finish, revise the task or discuss appropriate repairs. Ceramic will not restore removed clear coat or repair the original damage afterward.
When Other Work Must Come First
Peeling clear coat, corrosion, chips affecting the underlying surface and problems after body repairs require separate assessment. Ceramic does not stabilise peeling paint or turn repair into an ordinary polishing step. Establish whether the surface is suitable and resolve the repair sequence before choosing protection.
Mention planned repainting before ordering. It may make sense to postpone coating that panel, agree other areas, or complete protection after repairs. For fresh paint, compatibility and application timing follow the requirements of the paint system used; there is no general “apply immediately” rule for every repaired panel.
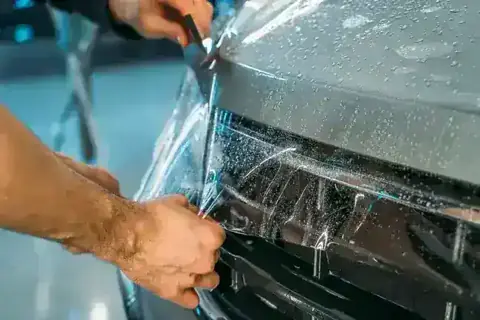
PPF also needs a suitable surface. Paint protection film helps reduce chip risk on vulnerable areas, but is not a way to cover peeling clear coat or avoid necessary repairs. Film preparation and material compatibility are agreed separately.
What Happens When Preparation Does Not Match the Task
Contamination and incompatible product residues can interfere with application and coating performance. If visible defects were not discussed, a customer may get gloss and water repellency yet still be disappointed by scratches. Preparing the foundation and agreeing visual improvement are related but separate questions.
Ceramic should not be described as hiding damage initially and inevitably revealing it after three or six months. There is no universal timetable for every car. Assess the desired result before application, including marks that will remain after reasonable correction.
Separate the proposal into preparation, coating and additional areas. This makes it easier to understand what you are paying for, the technical limits and the implications of declining a step. A more expensive recommendation should be explained through the vehicle's condition before any work starts.
Agreeing the Budget and Sequence
The BESTAUTO ceramic coating page lists these starting prices:
- body ceramic coating — from 500 ₾;
- body polishing — from 690 ₾;
- the separate polishing + ceramic offer — from 990 ₾;
- interior ceramic treatment — from 300 ₾;
- glass rain-repellent treatment — from 150 ₾.
These entries cover different jobs and areas. The 690 ₾ starting price is not tied to an invented “level 2 for a medium sedan,” and the 990 ₾ offer does not promise every kind of deep correction for a fixed amount. Preparation, the selected material, coverage, the final quote and timing are agreed after inspection.
If the budget is limited, discuss less correction, particular areas or delaying the coating. The choice depends on your goals and the finish. Partial polishing does not always produce a poor result, and treating the whole body is not always necessary. Agree possible differences between panels and whether that outcome suits you.
Polishing and ceramic can be planned consecutively. If there is a gap, the surface is reassessed and cleaned; further abrasive work follows its actual condition rather than becoming automatic after two or three weeks. The current body-coating offer provides an effect of up to 3 years with proper care, not a guarantee of defect removal or a lifespan for interior or glass products.
Frequently Asked Questions About Preparation
How Do I Know What Preparation My Car Needs?
Describe repainting, earlier polishing and what you dislike about the finish. Photos can begin the discussion, while inspection determines the work. The car's age and visible washing marks do not automatically assign a compulsory “level.”
What Does Preparation Cost Separately?
Body polishing starts from 690 ₾; the separate polishing + ceramic offer starts from 990 ₾. Additional work and the final quote follow condition and coverage. Ask which defects the work aims to reduce and what the selected offer includes.
Can I Polish Now and Apply Ceramic Later?
Yes, the sequence can be discussed. The surface will need another assessment and cleaning before coating. Whether it needs polishing again depends on its condition after use; the calendar gap alone does not make abrasion compulsory.
Does Deep Polishing Remove a Lot of Clear Coat?
Abrasive correction removes part of the surface, so its limits must be assessed before work. No single amount of clear-coat removal can be promised safe for every car, and a total paint reading does not establish the remaining clear layer by itself.
Can Only the Bonnet, Roof or a Particular Area Be Treated?
That scope can be considered if it suits the condition and the goal. Discuss gloss differences between panels, remaining defects and future coating areas. Decide for the actual car rather than following a rule that partial work is always worse.
Preparation That Suits the Vehicle
A useful plan starts with inspection and a clear description of the result. Cleaning, polishing, repair and coating do different jobs. Choose their sequence before work, with the technical limits and agreed budget in view.
All services are available at both studios: Saburtalo and Guramishvili. Choose a convenient studio on the service page to discuss the finish, preparation and coating. Initial photos can start the conversation; the final work and schedule follow inspection.