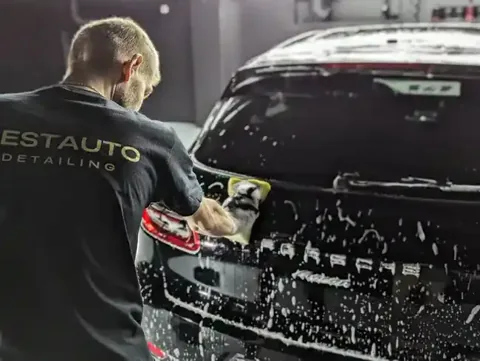
★★★★★
The guys did a fantastic polishing job, touched up the chips and removed all visible imperfections. As a bonus, they polished the headlights and also cleaned up the interior. The car looks like new…


A car headliner looks like a simple surface, but technically it is one of the most difficult zones in the interior. Under the visually uniform fabric sits a three-layer construction: decorative fabric on top, 3-5 mm foam backing, and glue that holds the fabric to the roof frame. The main cleaning problem — the glue is water-soluble. Wrong wet treatment destroys the glue layer, and within 2-6 weeks the fabric ceiling starts sagging: first at corners and edges, then across the whole area. Repair means a full headliner re-upholstery at a specialist shop — a substantial expense that takes several days in the upholstery shop. Below: why DIY headliner cleaning often ends in a re-upholstery, how the studio minimum-moisture technique works, and when it is better not to touch the ceiling at all.
A modern fabric headliner is not just fabric glued to metal. Construction is more complex:
Layer 1: decorative fabric. Usually knit, microfibre or a perforated non-woven material. Thin (0.5-1 mm), with a texture matched to the brand.
Layer 2: foam backing. 3-5 mm of medium-density foam. Gives the ceiling a soft feel and sound absorption. The foam is sewn to the fabric at manufacturing.
Layer 3: adhesive layer. Thermally activated water-based glue. It sits on the foam and on a rigid frame (ABS plastic or cardboard in some models). Heat and pressure "set" the glue — that is how the headliner is assembled at the factory.
Layer 4: rigid frame. A cardboard or plastic moulded shield bolted to the metal roof. Premium cars often have a plastic frame that is more moisture-resistant; budget cars use cardboard that can simply pulp from water.
The key problem is the water-based glue. Any wet headliner treatment that reaches the foam softens the glue. At first nothing visible, but within a couple of weeks the foam begins to separate from the frame under its own weight plus the weight of the fabric. Result — a sagging ceiling that must be removed and re-adhered completely.
Typical DIY scenario: owner sees a grease or nicotine stain, grabs a damp cloth with a cleaning spray, scrubs. The stain disappears or fades. Owner is happy. What follows:
Week 1. Surface is dry, visually fine. Beneath — the foam soaked up some chemistry and water.
Week 2-3. The foam still holds residual moisture. The glue on the "foam-to-frame" boundary slowly breaks down from water-soluble components.
Week 4-6. At the corner that received more chemistry, slight sagging appears — 2-3 mm. Not critical but visible on inspection.
Month 2-3. Sagging grows; the glue in that zone is destroyed. Fabric and foam start detaching from the frame under their own weight.
Month 4-6. The ceiling has sagged by 1-2 cm, the defect is obvious. Owner starts looking for a shop. Repair — full interior re-upholstery (old material no longer holds glue) — a substantial expense that takes several days in the upholstery shop.
This scenario repeats for 60-70% of owners who tried to "quickly clean the ceiling at home". The problem is not that cleaning did not work, but that consequences are delayed in time and not linked to the cause.
List of forbidden techniques for any fabric headliner:
A damp cloth with any cleaner. Water and chemistry reach the foam and start the glue-destruction chain. Even if nothing visibly seeps through — it does on the micro level.
Steam generator close to the headliner. High temperature plus moisture is the worst combination for the glue. Heat reactivates it, but simultaneously thins it, and it stops holding weight. 10-20 seconds of steam on one spot is already a local sag risk.
Spray with chemistry on dry fabric. Even if the product is "for headliners" — spraying leaves too much liquid in the foam. Micro-dose specialist compounds exist professionally, but not in the consumer version.
Hard rubbing with a brush or sponge. Destroys the decorative surface — pills, fibre lifting, and colour loss.
Vacuum with a hard attachment. The decorative fabric is thin, and a hard vacuum brush snags it and lifts the nap. After a few cleanings pills and bald spots appear.
What is allowed — only a dry microfibre without pressure (picks up dust) and a soft brush for local touches. Everything else — go to a professional.
At BESTAUTO headliner cleaning is part of interior cleaning, but work on it is done separately with a specific technique. Key principle — minimum moisture, maximum mechanics.
Step 1: dry prep. The headliner is vacuumed with an industrial unit and a soft wide attachment (no hard bristles) to remove surface dust. Mandatory — otherwise subsequent cleaning turns dust into a dirty slurry.
Step 2: spot stain removal on a cotton swab. If there are specific stains (grease, nicotine, open-bottle splashes), they are treated point-wise — the compound goes onto a swab or the edge of a microfibre, not directly onto the ceiling. This keeps chemistry in the fabric, not the foam.
Step 3: steam through microfibre, not directly. When the whole ceiling needs a general clean, steam is used — delivered through microfibre folded into several layers. Steam loosens dirt in the fabric, the microfibre absorbs it, and almost nothing reaches the foam. Steam temperature is controlled — no higher than 110°C, otherwise glue activation becomes a risk.
Step 4: mechanical combing with microfibre. After steam, the ceiling is wiped several times with a clean microfibre in one direction — picks up lifted dirt and moisture residue. Each microfibre side is used once, then swapped.
Step 5: quick drying with hot air. A heated blower traverses the ceiling, evaporating micro residues. Not a hair dryer (pinpoint heat is risky), but an industrial blower with even airflow.
Step 6: final visual check. The technician verifies no darkening near the edges (a sign of moisture ingress into the foam), no corner sag, no rubbing marks.
Total process on a sedan — 40-60 minutes. On an SUV with a panoramic roof — 60-90 minutes. Part of general interior cleaning, not a separate service.
There are situations cleaning cannot solve:
Ceiling is already sagging. If sag exceeds 1-2 mm, the glue is gone. Cleaning gives a cosmetic effect for a week, but the sag continues. Only solution — re-upholstery.
Nicotine yellowing after 5+ years. Deep nicotine saturation goes through the fabric into the foam. Cleaning lightens the top layer, but within a month nicotine diffuses back up from the foam and yellowing returns. In such cases — accept it or re-upholster.
Dark spots of unknown origin. For example, drips from an AC or roof leak. If the stain has a sharp outline and dark colour — it is not dirt but a diffusion stain that is now part of the fabric structure. Cleaning will not remove it.
Perforated fabric (some premium cars). Perforation makes the fabric even more sensitive: dirt particles sit in the holes, and without specialist equipment they cannot be pulled out. Recommendation — only professional cleaning with correct technique.
In these cases the technician tells you on inspection that cleaning will not deliver a result and suggests leaving it as is or looking for an upholstery shop.
If the car is new or the ceiling is in good shape, daily care is limited to a minimal set:
Regular dry microfibre wipe. Every 1-2 months a dry microfibre pass without pressure over the whole ceiling picks up settled dust. Dust is the main abrasive and odour absorber, so do not let it accumulate.
Preventive vacuum — carefully. If you use a vacuum, only a soft wide attachment at minimum power. No narrow attachments and no hard brushes — they lift the nap.
Do not smoke in the car. Nicotine stains the ceiling more than any other contaminant. After 2-3 years of cabin smoking the ceiling turns yellow-brown, and full recovery via cleaning is not possible.
Do not haul dirty large items to the ceiling in the boot. In crossovers and SUVs this is a frequent cause of stains on the boot ceiling — tourist gear, work kit, tool boxes all leave marks.
No "tree" air fresheners in the cabin. When the plastic base rubs the ceiling while driving, it leaves a greasy track that is very hard to remove afterwards. Clip-on fresheners for vents are safer.
Headliner cleaning is not billed separately at BESTAUTO — included in general interior cleaning. Pricing:
A ceiling in good shape with surface dust is handled within "light" or "medium". A ceiling with visible stains, nicotine yellowing or sag usually goes under "heavy" (550 ₾) because work on it is more labour-intensive and takes longer.
If the ceiling is already sagging and re-upholstery is needed rather than cleaning, BESTAUTO does not do that — it is the profile of dedicated upholstery shops. The studio can only clean what still holds — to postpone re-upholstery.
Full pricing — on the interior cleaning page.
Signals for a professional procedure:
If the ceiling still holds firmly on the frame and the above signs are absent — cleaning can be postponed. Preventive "just in case" cleaning without real soiling is a pointless risk: water does not reach the foam, but the procedure also gives no benefit, while the thin decorative fabric slowly wears with each treatment.
The headliner is part of the whole interior system, and its state correlates with seats, door cards and plastic trim. If the whole car has not been cleaned in a while, the ceiling is usually in worse shape than seats — because owners reach it last or not at all. Within a full interior cleaning, the ceiling is treated in parallel with other surfaces, delivering an even result.
Ordering only headliner cleaning without other zones is usually not worth it — the studio still has to prep equipment and spend time on intake, and "ceiling only" pricing does not differ much from a full procedure. Plus, after a fresh headliner, old greasy seats contrast with the clean ceiling, and you want to clean everything.
Only with a dry microfibre or a soft brush for dust. Any wet treatment at home is a guaranteed risk to the glue. If there are stains dry method does not lift — better postpone until a studio procedure than try a wet method.
Repair is only possible via re-upholstery at a dedicated shop. BESTAUTO does not do that — the studio can only clean what still holds to postpone re-upholstery. A full re-upholstery is a substantial expense that takes several days in the upholstery shop.
Steam above 110°C reactivates the thermosensitive glue between foam and frame. Activation thins the glue, then it stops holding weight. Result — local sag at the treated spot. Via microfibre, steam is safe because the cloth absorbs most of the temperature and moisture.
If the ceiling is just dusty — cleaning lasts 6-12 months with careful use. With cabin smoking or carrying large dirty items — less, 3-6 months. A full preventive interior cleaning every 12-18 months is the optimal frequency for most cars.
Odour in the ceiling is not only surface contamination but also foam and frame saturation. Cleaning removes the surface smell, but full elimination requires ozone (+50 ₾) — ozone penetrates the foam and breaks the odour molecules. Without ozone, the smell returns from deep layers within 2-3 weeks.
A car headliner is the most delicate zone in the interior due to its glued construction and water-soluble adhesive. DIY wet cleaning often ends in sagging within 1-3 months and a need for full re-upholstery — a substantial expense that takes several days in the upholstery shop. Studio technique is built on minimum moisture: steam through microfibre, spot stain removal on a cotton swab, quick hot-air drying.
If the ceiling already sags, cleaning will not solve it — re-upholstery at a separate shop is needed. If the ceiling is in good shape, a preventive cleaning every 1-1.5 years within a full interior cleaning is the right frequency. At BESTAUTO this falls under "heavy cleaning" from 550 ₾ for noticeably soiled ceilings, or under "light" (from 400 ₾) and "medium" (from 500 ₾) for surface dust.
Key takeaways:
Book interior cleaning with proper headliner treatment at BESTAUTO via the form on the service page or by phone:
Both studios are open Mon-Sat, 10:00–20:00. Mention any ceiling sag when booking — the technician will assess whether it still qualifies for cleaning or needs re-upholstery at a separate shop.
The guys did a fantastic polishing job, touched up the chips and removed all visible imperfections. As a bonus, they polished the headlights and also cleaned up the interior. The car looks like new…
Best service, Real professionals.
Highly recommend! Professional staff, flawless detailing, and my car has never looked better
Brought my car here for full detailed cleaning and was not disappointed! Thank you guys for your professionalism and attention to detail, my recommendation to you!
Excellent service and a strong focus on delivering results. The team was professional, attentive, and committed to providing high-quality service. I am genuinely satisfied with the overall experience…
The best service! The work was done within the agreed time frame! The best professionals! Good luck!
I had my car detailed and ceramics applied on the surface. The visible wear and tear that was on the body was impressively refreshed. I appreciate that in the services, they included one extra panel…
I was stunned by the outcome. My old Ford looks good as new and smells like nothing! Highly recommended!
great staff
I had my BMW X5 polished and dry-cleaned. I'm very pleased with the results – the bodywork looks like new after polishing, with a deep shine and minor scratches gone. The interior is clean and fresh…
Got our car patched up super quickly by them. Beka spoke great English and was very ready to discuss and help us find our best needs- did not pressure us at all to do things that we did not need.…
It's an ideal environment and situation!
It's an ideal environment and situation!
Excellent detailing! I used BestAutoDetailing – they did everything very quickly and very well, completing the job in just three days. The car was delivered in perfect condition, and their attention…
Professionalism and a comfortable environment together are rare today👌 My recommendation to the entire team..Thank you ✊
Our detailing studio will handle your task with quality
Book a consultationBook a visit
Write your phone number, we will call you back and tell you everything about the service you are interested in
Free inspection, pre-consultation and booking for main services available at both locations